So… I made Sticker Packs for iOS in Xcode!
So… I made sticker packs for iOS in Xcode! And that’s why it’s been a while since I’ve posted here. I’ve been learning the process of creating, publishing, and marketing my stickers. It’s been a fun ride. What is a sticker pack, you ask? A lot of my friends had no idea what sticker packs were when I told them. Apple has not overly promoted this feature and they can be tricky to find in the App Store. Stickers and apps for Messages (Apple wants you to use their app for messages – Apple Pay) have their own App Store within the App Store. It’s weird. The above listed video will show you a bit on how stickers work. My stickers are currently free through Mar. 30. After Mar. 30, they will be 99¢. I update the stickers frequently, and I take on user suggestions for additions.
Doodling
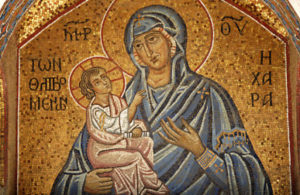
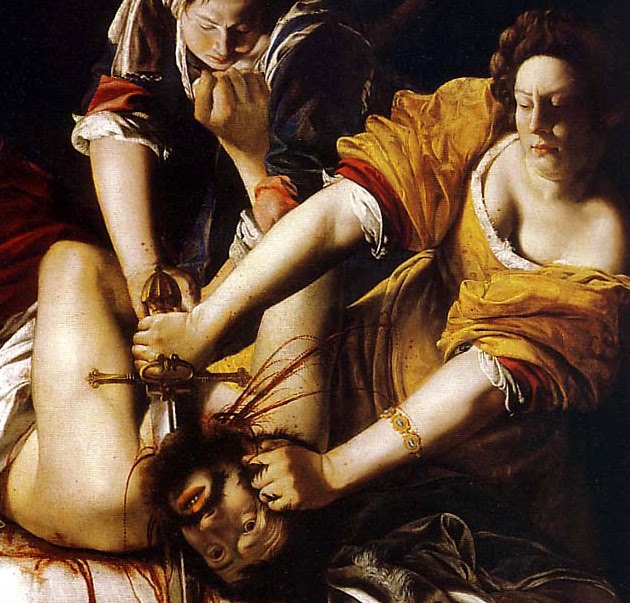
 I’ve been doodling since childhood. While my art has never reached the level of Caravaggio, Da Vinci, or any of the amazing old masters I’ve always admired, I have a style. It’s cheesy, but it’s mine. And – as I get older, I am embracing my style more and more. I had a wonderful art instructor at Brookhaven Community College back in the late 1980s, Patricia Forrest. I think it was in the Design II class she was teaching that she gave us a project that required us to paint with acrylics. I let out a groan like I’d been harpooned. Pat kindly asked, “what’s the matter?” I told her, “I can’t paint!” She retorted, “yes, you can.” I crinkled my brow. Like how would she know? She hardly knows me (we became good friends down the line, but I was kinda new there at the time) – how would she know if I can paint or not?! “No, I really can’t even dye an Easter egg a solid color.” She wisely replied, “you can paint – you just can’t paint the way you’d like to be able to paint.” I just kinda blinked. She asked, “who’s your favorite painter?” I replied, “Artemisia Gentileschi.” She had the most adorable laugh (she sadly passed in 2010) and she replied, “Shelley, no one can paint like her. Just relax and paint in your style.”
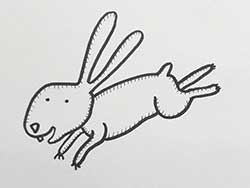
Did this make me a good painter? Meh – but I did prove to myself that I actually CAN paint. I just don’t like painting. I do like doodling, though… but I always had that inner voice saying, “You’ll never have the panache of Gary Larson,” or any other cartoonist I appreciated. When stickers were announced at the Apple Keynote 2 years ago – I thought, “wow – I might actually have a legit use for my doodling!” I’ve worked on perfecting a style for my characters so I can reproduce new ones for a series that look like they’re related to the originals. That was a process.
Process
Creating a sticker pack is ridiculously simple. You do need to own a Mac (Macbook, Mac Mini, iMac) with a current version of MacOS X. There are ways to accomplish coding to some extent using 3rd party tools on Windows, but they aren’t very polished yet. Apple has made Swift, it’s programming language, open source. This opens the door for more possibilities of Windows geeks being able to make iPhone apps without having to have a Mac – but that remains to be seen.
As for me, I’m a Mac person, so that part was easy. You have to have Xcode – which is a free download from the Mac App Store. And, if you want to publish to the App Store (even if you want all your items to be free), you have to pay an annual $99 fee for your Apple Developer License. While this may sound pricey, it’s actually a better deal now. In the past, you had to get a license just for Mac OS, then another license if you wanted to write apps for iOS, then another one if you wanted to write an app for AppleTV.
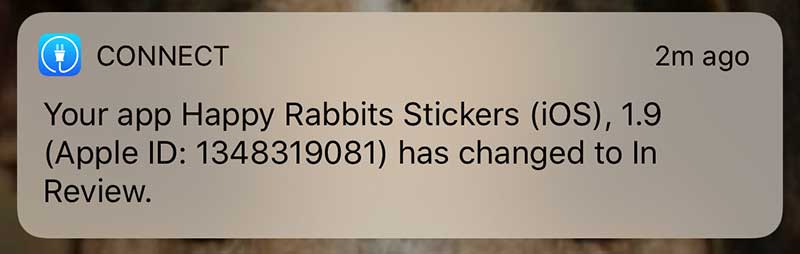
When you first successfully submit your app to the App Store via Xcode and then get this push notification from Apple that your App is in review – well, it’s freaking amazing.
I searched through YouTube and Googled like crazy to learn how to make sticker packs, but there wasn’t anything clear and concise. I knew other artists had figured it out – because there were artist packs already in the store. But how? Finally, I took this course on Udemy.com and learned how the Xcode process worked. The course was laid out pretty well. Clean and concise and the speaker was easy to understand. I came up with a concept and designed my first few stickers, then went ahead and bought my developer license. I could always add more stickers later. 🙂
Success
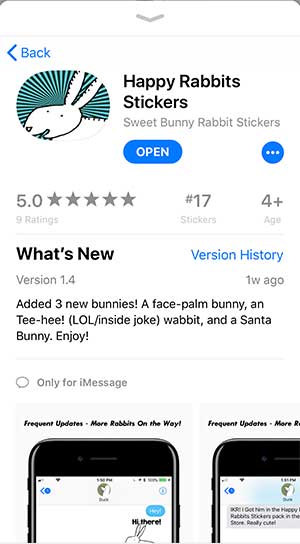
Y’all. Seriously. My sticker pack was ranked #17 in all of stickers in the App Store – for an afternoon. It was Mar. 7, 2018. It was glorious.
I worked at the Apple Store in Plano, TX, from 2004-2009. It was a time I will always cherish. It was fun to work with other Apple geeks. God had fulfilled a lifelong dream of working for Apple. Of course, in my childhood fantasies, I was a software engineer in charge of an entire department, and hanging out at a fishing pier with Steve Jobs, not selling retail – but still. I can still say that I worked for Apple. And my maiden name is printed on their 30th anniversary posters on display somewhere in Cupertino. Go me!
As cool as it was to have an @apple.com e-mail address and be able to say I worked for the coolest company on earth, getting my name to show up in the App Store w/ my creations is far, far cooler. And geekier. If you want to do this, you can do this! I’m thinking of writing my own course in Udemy on the process, because creating the artwork itself is not covered the the aforementioned course. I had each of my (currently 3) sticker packs reviewed by App Advice. The coverage got one of my sticker packs rated as #17 in stickers in the App Store. The ranking is fluid and didn’t last long – but WOW. You have to be in the top 200 just for ranking to show – and I was in competition with known brands like Snoopy and Simon’s Cat. For real. Recently, my stickers have been holding their own in the “Animals and Nature” category within Stickers, usually in the top 150 or so, which is also nothing to sneeze at.